RockShox MegNeg Ultimate Guide and Review
In this RockShox MegNeg Ultimate Guide and Long Term review, we are going to take a close look at the MegNeg upgrade kit, and how it’s performed over the past 8 months as well as what the MegNeg is, How to install it, Compatibility, Benefits, Tuning Guide and Review.
What we cover in this MegNeg Ultimate Guide and Review:
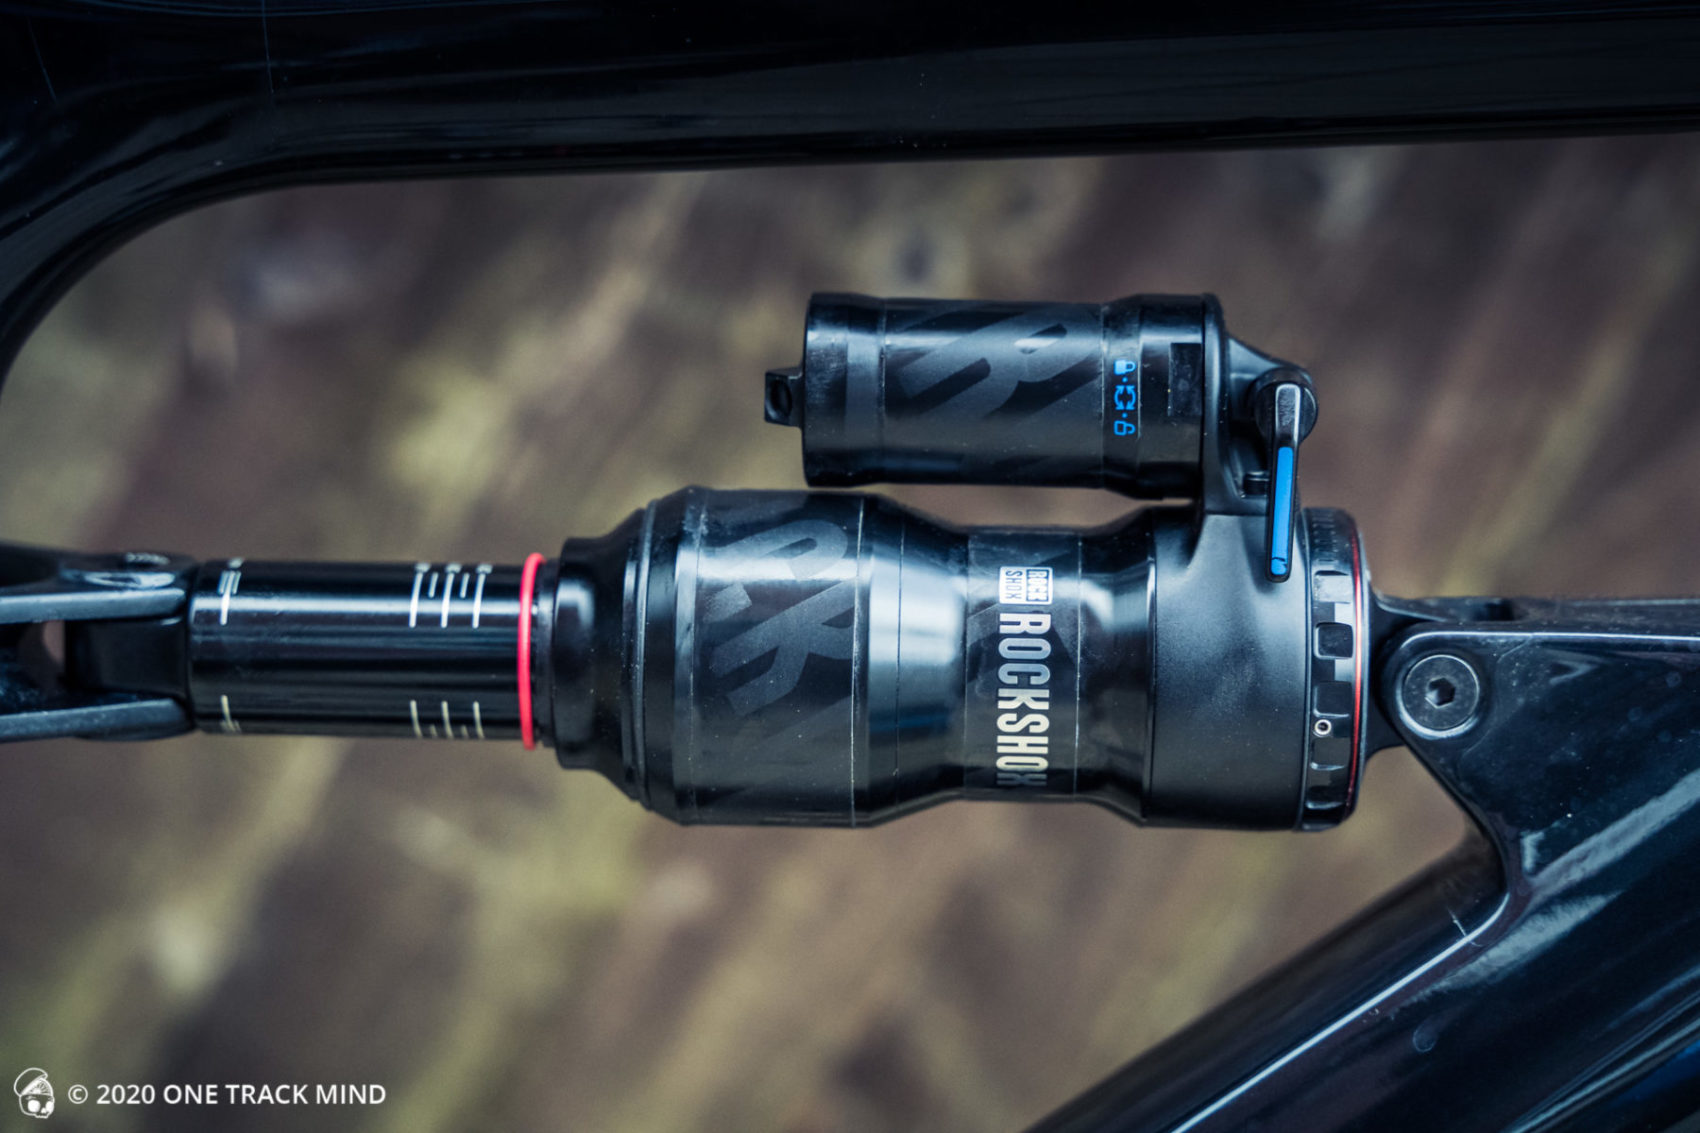
What is the RockShox MegNeg Upgrade Kit?
Description
Featuring more tunability than ever before, the Megneg air can provide an even larger negative volume giving you more mid-stroke support, a plusher initial feeling, and more bottom-out force using fewer tokens. Go ahead and tune your shock exactly to your ride requirements.
MegNeg Air Can Features
- Includes air can, tokens, seals & decals
- Compatible with Deluxe and Super Deluxe shocks
- MegNeg air can is not compatible with MY21 Super Deluxe Ultimate ThruShaft.

RockShox MegNeg Review
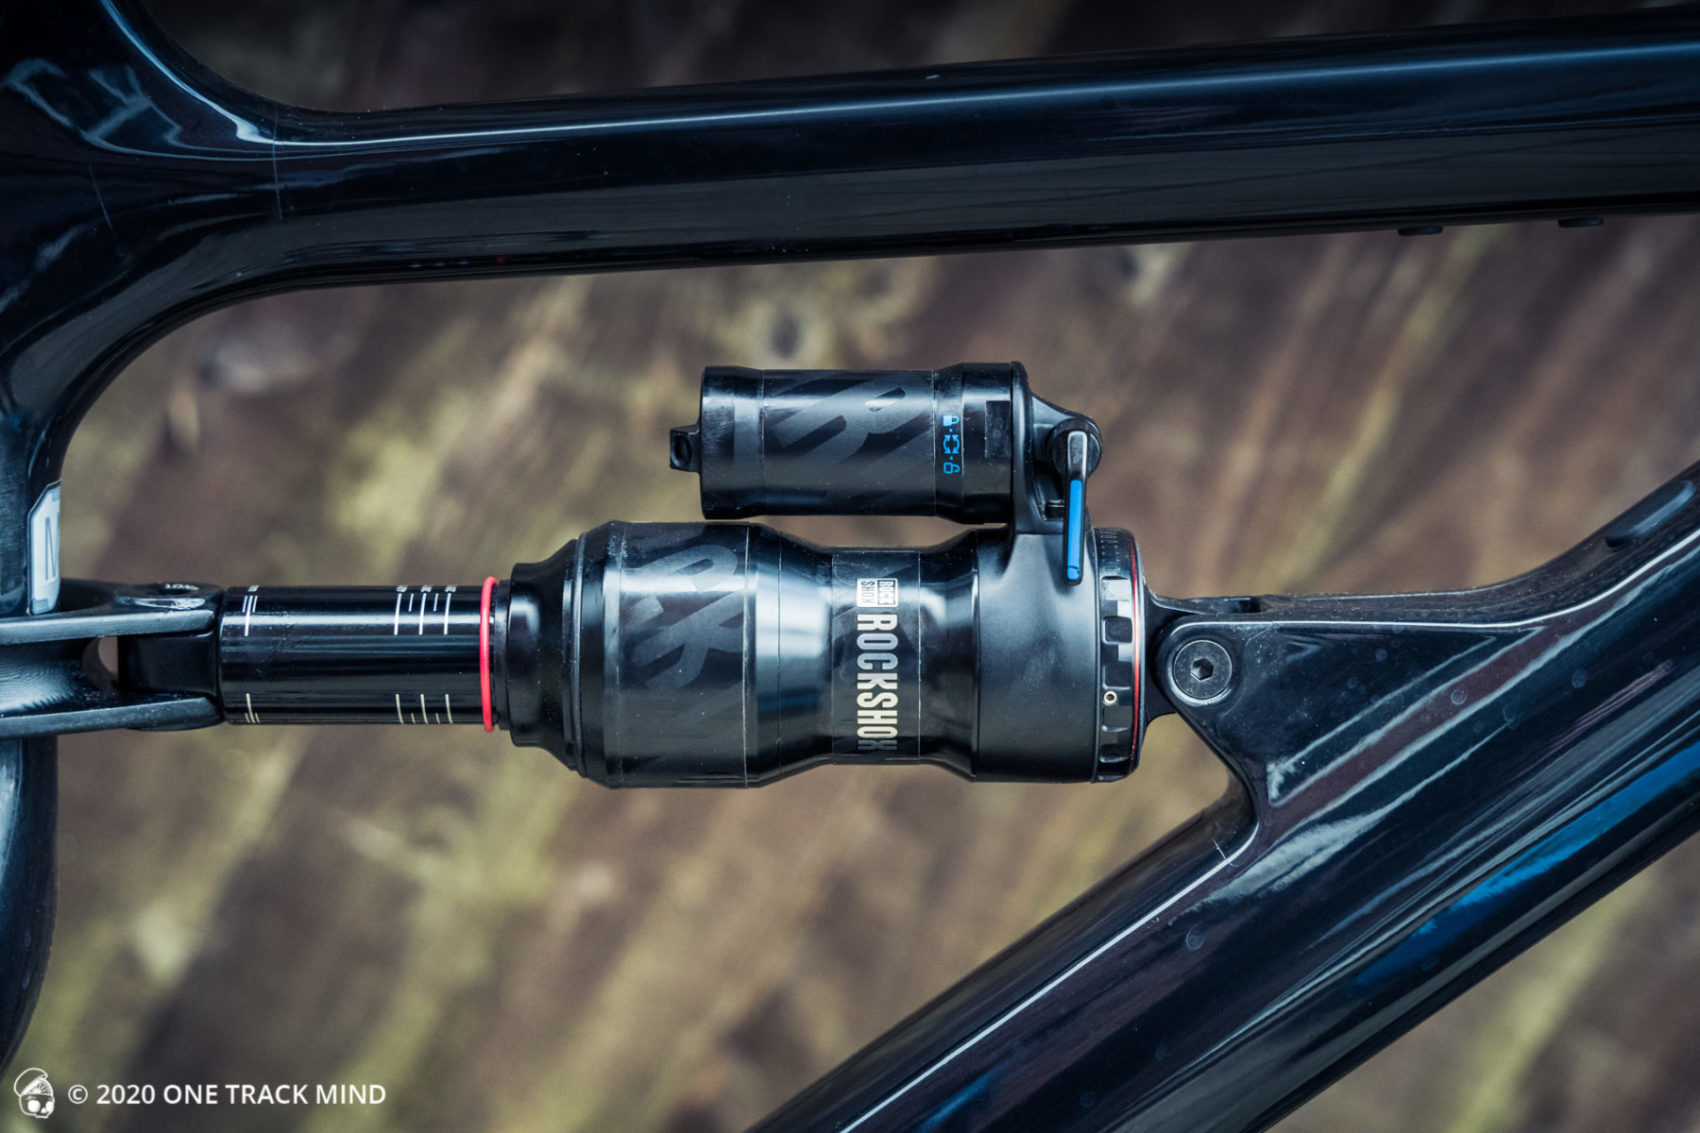
I decided to fit the RockShox MegNeg on my Cannondale Habit after I increased the fork travel from 140mm to 150mm. After this change, I found that I had less mid-stroke support in the rear where the bike felt like it would wallow particularly in corners and pumping as well as an increase in pedal bob when climbing.
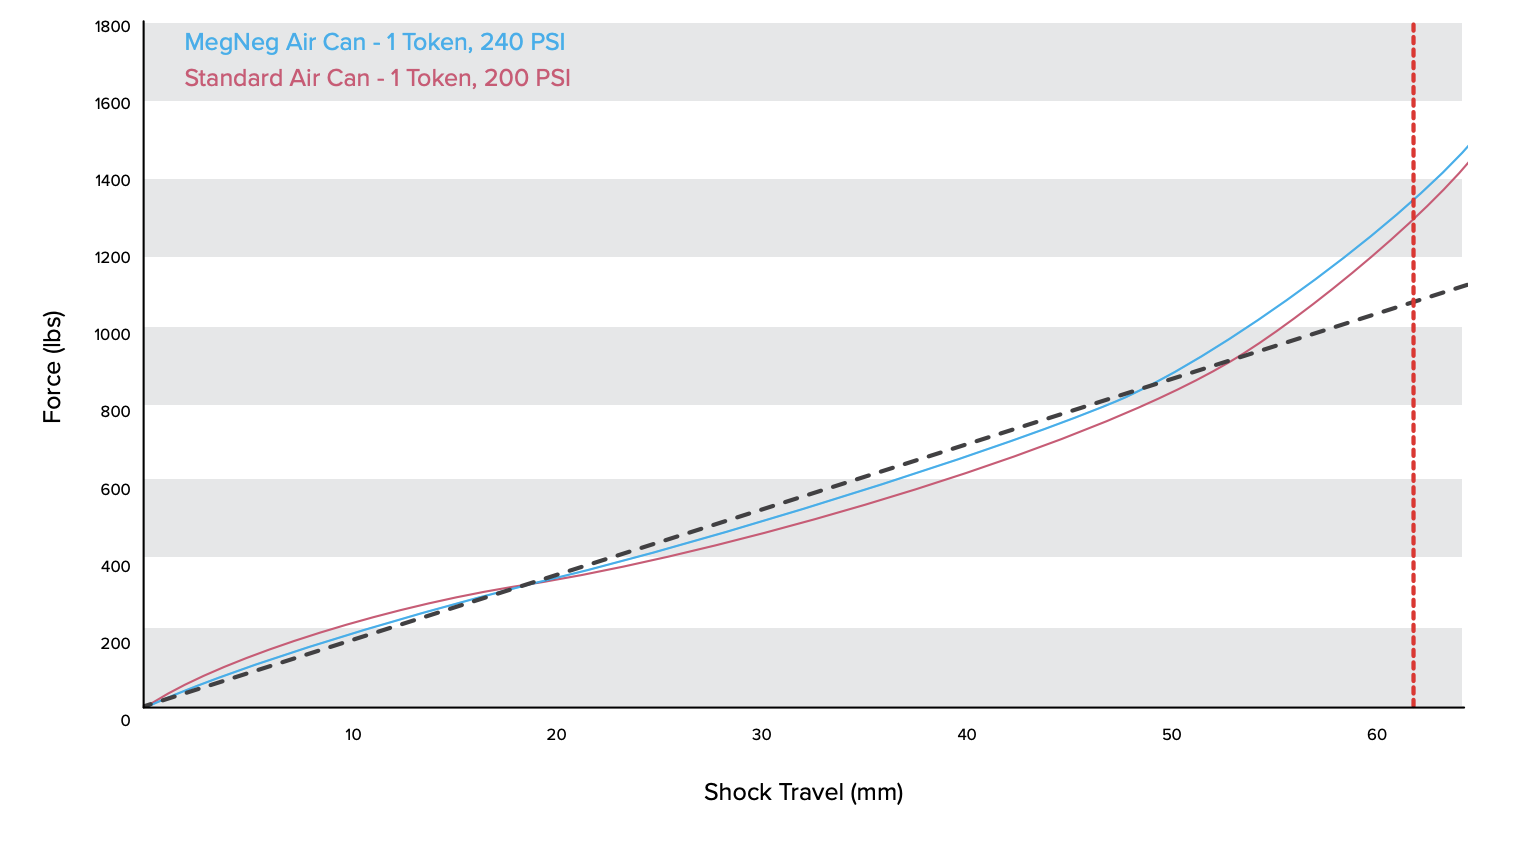
The MegNeg increases air capacity in the negative chamber by 111%. This additional capacity makes the spring softer before and firmer after your set sag. Volume spacers only significantly affect the end of the stroke, but the MegNeg air can upgrade increase the spring force in the middle of the travel. Volume-reducing bands also supplied in the kit can be utilized to reduce the effects of the negative chamber.
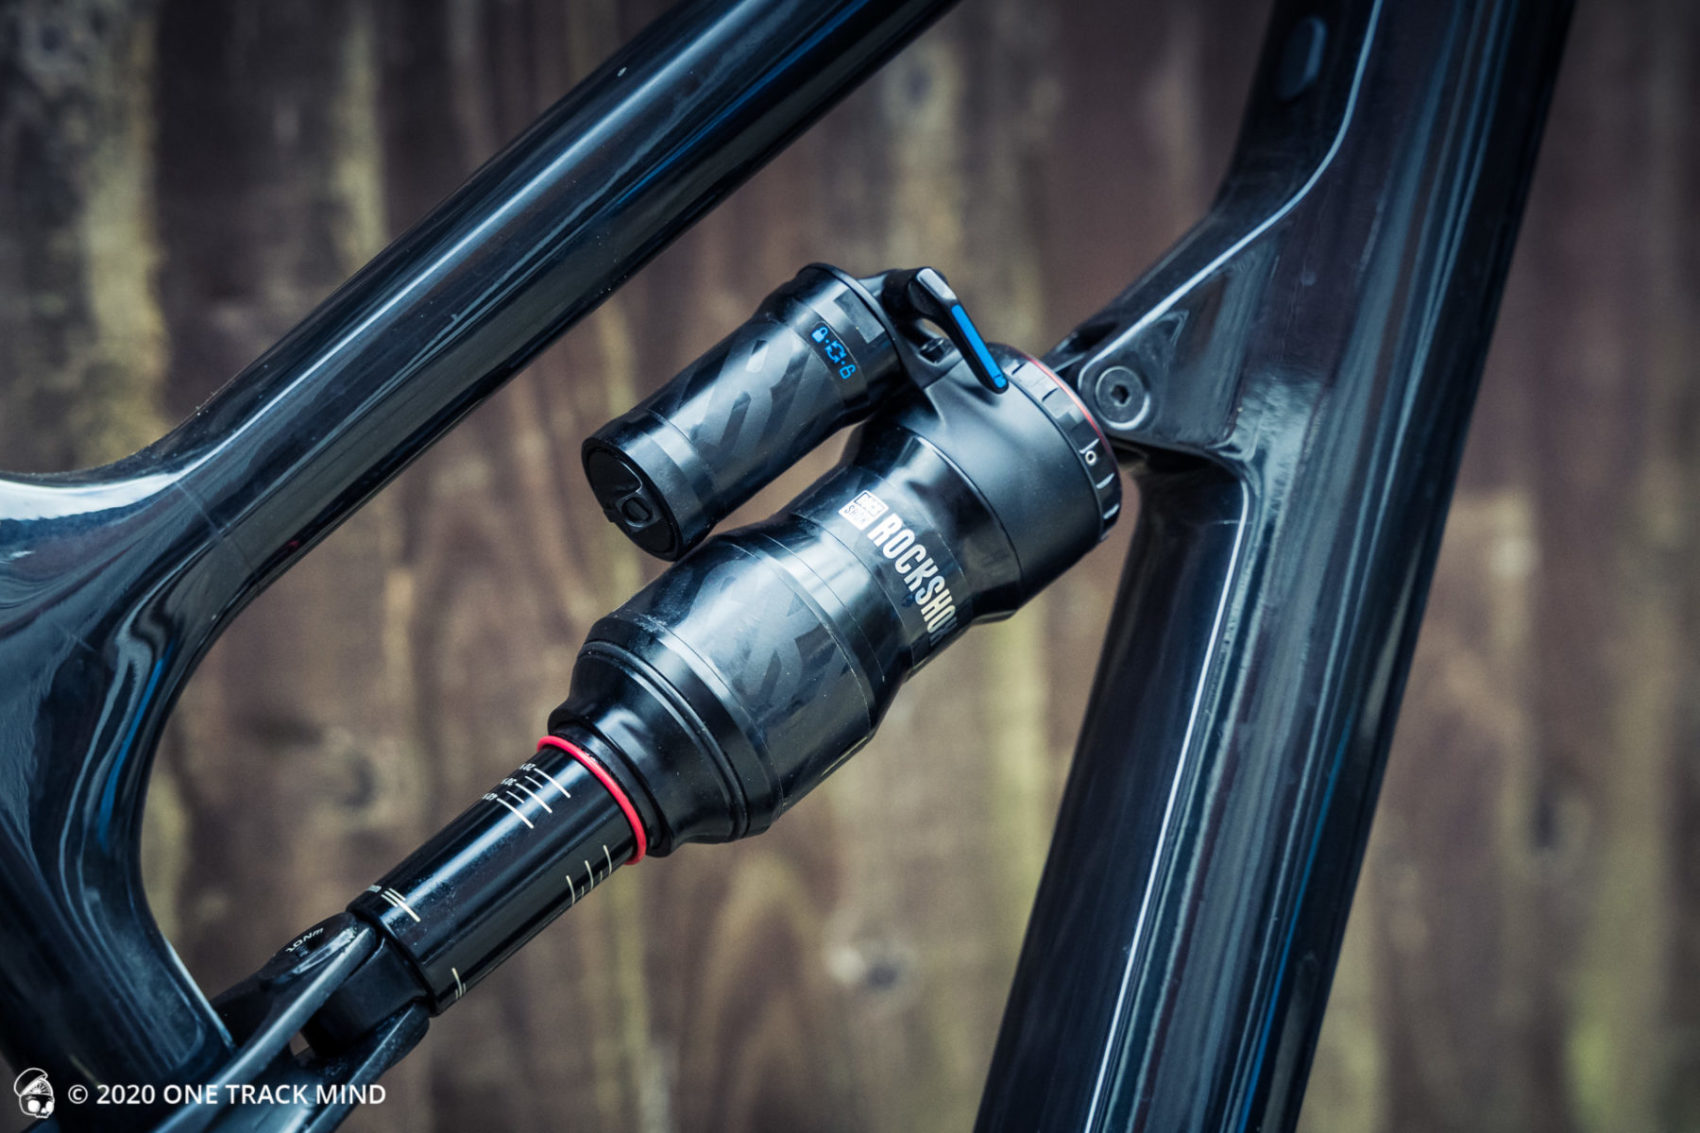
After fitting the MegNeg on my bike I instantly noticed the difference. No more wallow during the mid-stroke, allowing me to pump more and corner more efficiently. The bike instantly felt more responsive and lively but another noticeable improvement was that small bump sensitivity performance also improved. This resulted in less chatter over small bumps.
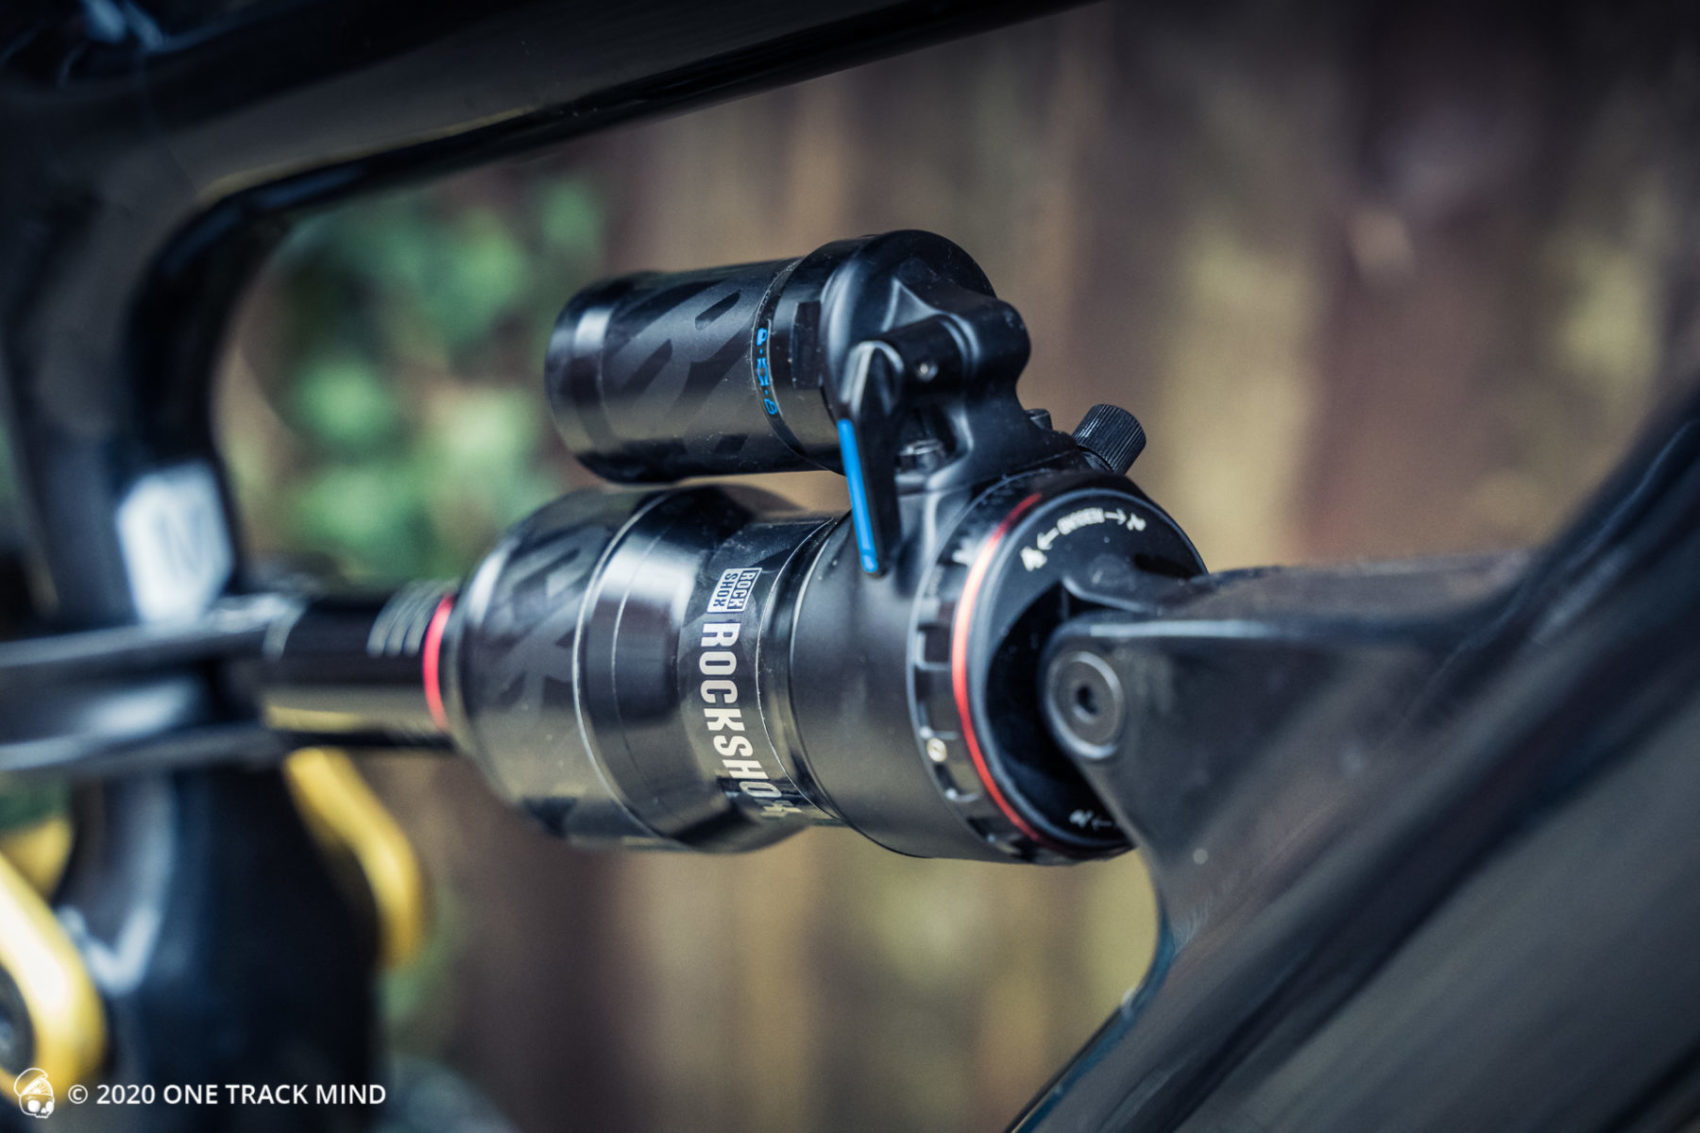
There are a couple of negatives to installing the RockShox MegNeg Air Can. The first being that the MegNeg does make it harder to use full travel. It took quite a bit of tweaking adding and removing spacers and bands to get a perfect balance of small bump sensitivity, mid-stroke support, and the use of full travel. I installed a Quark ShockWiz to help me get this sorted as quickly as possible. You can read my review of the ShockWiz here.
Another negative that I haven’t personally experienced but have heard from a few people is that because the MegNeg requires an additional 20% air pressure this can take the PSI over the maximum making the MegNeg upgrade kit unsuitable for some of the heavier riders out there.
- Improves small bump sensitivity
- Drastically improves mid-stroke support
- Relatively low-cost upgrade
- Can make it harder to use full travel
- Requires an additional 20% Air pressure making it unsuiable for some heavier riders that require high PSI
MegNeg Install Guide
In this section of our RockShox MegNeg Ultimate Guide, we are going to walk you through installing the MegNeg.
Standard Can Removal
RockShox MegNeg Ultimate Guide to removing the standard air can.
1.
Record your air pressure setting to assist with post-service setup. Remove the air valve cap. Use a small hex wrench to lightly depress the Schrader valve and slowly release all air pressure from the air can.
⚠CAUTION – EYE HAZARD Do not disassemble a pressurized shock, this can cause suspension oil or debris to forcefully eject from the shock. Wear safety glasses.
Slowly release the air from the air can to make sure the air is removed from both chambers. Quickly releasing the air can trap air in the negative chamber and cause the air can to forcefully eject from the shock upon disassembly. Use a Schrader valve core tool to remove and reinstall the valve core from the valve body to make sure all air has been removed.
2.
Clamp the shaft eyelet into a vise, with the shock positioned horizontally.
3.
Remove the sag indicator.
4.
Insert a shop towel through the damper body eyelet to prevent the air can from forcefully ejecting from the shock.
⚠CAUTION- EYE HAZARD The air can may still have air pressure in the negative chamber, which may cause the air can to forcefully eject from the shock upon disassembly. Wear safety glasses.
5.
Use a strap wrench to remove the air can. Wrap the strap around the section of the air can furthest from the shaft eyelet. Turn the wrench counter-clockwise to unthread the air can.
NOTICE Do not place the strap wrench on the air can decal.
Once it is completely unthreaded, slowly pull the air can along the damper body to remove it. Remove the shop towel from the damper body eyelet. Vacuum pressure will increase as you pull the air can along the damper body, and will suddenly release when the air can is pulled over the air piston.
6.
Remove the Counter Measure.
7.
Remove 1-2 tokens from the positive chamber of your shock. The RockShox® MegNeg air can produces more force near bottom out.
NOTICE If you do not remove any tokens from the positive chamber, then full travel may be difficult to achieve.
Token Removal: Clamp the shaft eyelet into the vise. Move the bottom out washer and o-ring away from the shaft eyelet. Use a pick to separate the token from the other tokens or the shaft eyelet, then remove the token from the shaft.
NOTICE Do not scratch the damper shaft, shaft eyelet, or the eyelet o-ring. Scratches can cause leaks.
8.
Clean the damper body.
Pro Tip: Since the air can is removed, this is a great time to give your shock a 50-hour service. Consult www.sram.com/service for the Super Deluxe™ or Deluxe™ service manual for 50-hour service instructions.
MegNeg Air Can Installation
RockShox MegNeg Ultimate Guide to installing the MegNeg Air Can
1.
Remove the shock from the vise, turn it over and clamp the damper body eyelet in the soft jaws. Install the Counter Measure onto the damper body. Apply grease to the seal head/air piston seals.
2.
Apply a thin layer of grease to the quad seal, backup ring, and wiper seal.
3.
Inject 1 mL of Maxima Extra™ 15w50, or half a pillow pack, along the internal wall of the threaded side of the air can before installing the air can onto the damper. Firmly press the air can over the damper body until the seal head/air piston is inserted into the air can.
⚠CAUTION- EYE HAZARD Oil will eject out of the openings as you install the air can onto the damper. Wear safety glasses.
4.
Inject another 1 mL of Maxima Extra 15w50, or the rest of the pillow pack, into the air can.
5.
Firmly press the air can onto the damper then thread it onto the shaft eyelet until it is hand tight. Clean the air can.
6.
Remove the shock from the vise. Turn it over and clamp the damper body eyelet in the vise. Stabilize the air can with a strap wrench to prevent it from rotating. Tighten the air can.
MegNeg Outer Sleeve Installation
RockShox MegNeg Ultimate Guide to install the MegNeg Outer Sleeve
1.
Install up to 4 bands onto the MegNeg air can. Slide the bands up the can toward the eyelet. If you are not sure how many to install, start with two bands.
NOTICE Make sure the bands are flush and flat. Do not cover the holes on the air can.
2.
Apply grease and install the two small o-rings to the grooves on the air can.
3.
Apply grease to the inner diameter of the outer air sleeve. Install the outer air sleeve onto the air can with the bump on the outer diameter of the outer sleeve oriented away from the eyelet. Slowly twist the sleeve as you slide it on to prevent damage to the o-rings.
4.
Slide the outer sleeve until it stops. Install the large o-ring in the remaining groove.
5.
Install the sag indicator o-ring.
Setup
1.
Reinstall the mounting hardware. Reinstall the shock to your bicycle frame according to the bicycle manufacturer’s instructions. Clean the shock and dry it with a shop towel.
2.
Use a shock pump to pressurize the shock to the recorded air pressure plus 20%. After adding air to the shock, the pressure will need to be equalized between the shock chambers. Record the air pressure value on the pump, then unthread it from the shock. Slowly but firmly press or sit on the saddle to compress the shock until there is a hissing sound. This sound indicates air transfer between chambers. Reinstall the pump and pressurize the shock to the desired air pressure. Record the air pressure, then unthread it from the shock. Repeat this process until you reach the desired amount of sag, then install the valve cap.
NOTICE – When pressurizing the shock, do not exceed the maximum pressure rating. The pump must be removed from the shock prior to checking sag to avoid damage to the pump.
3.
Apply the decals from the kit so they are facing the desired direction, according to the orientation of the shock on your bike.
MegNeg Service
The MegNeg is easy to service yourself or you can get it serviced at your local bike shop. Click the link below for the SRAM service guide.
MegNeg Upgrade Kit Compatibility
The MegNeg air can is compatible with the model year 2017 – 2021 RockShox® Deluxe™ and Super Deluxe™ shocks with a stroke between 47.5-75 mm. The MegNeg air can is not compatible with Super Deluxe ThruShaft rear shocks (RS-SDLX-THRU-C1). The stroke size is printed on the bottom of the damper. The MegNeg air can will increase your air pressure by about 20%. Add 20% to your current air pressure value, and verify that the new value does not exceed the maximum rated pressure printed on your shock eyelet.
Stroke (mm) | MegNeg kit |
| 47.5-55 | 550 Kit |
| 57.5-65 | 650 Kit |
| 67.5-75 | 750 Kit |
MegNeg Upgrade Kit Benefits
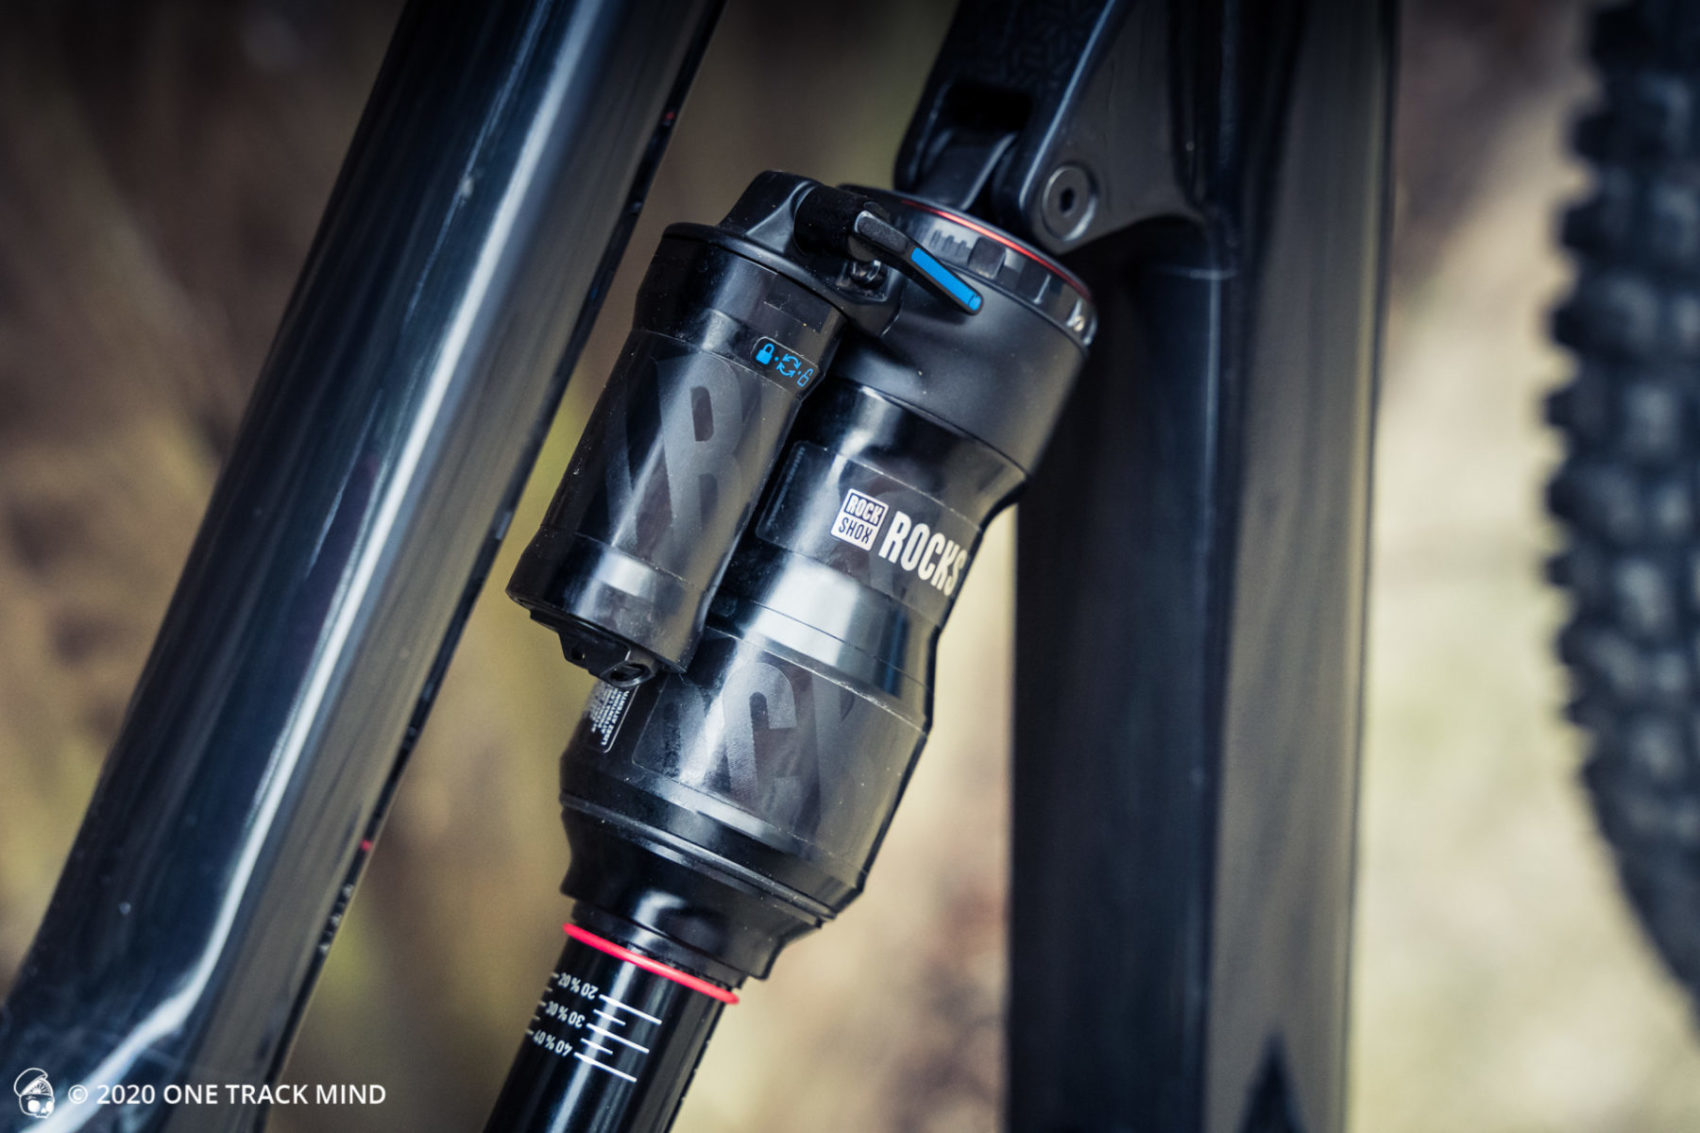
The MegNeg air can provide better small bump compliance, more support in the middle of travel, and is harder to bottom out than the standard air can. Adding the MegNeg air can allow you to play around with your suspension, tuning the positive and negative springs. Generally, these customizations are good for smart, fast, and aggressive riders like you.
MegNeg Tuning Guide
The RockShox MegNeg air can ships with an outer sleeve and DebonAir™ bands for negative air tuning. Add bands for less negative volume, less air pressure, and less air ramp. Use the table for negative volume percentages.
The outer sleeve must be installed for the rear shock to perform properly. Whether or not you install any bands, the outer sleeve must be installed onto the rear shock.
MegNeg Tuning Table
Air Can Tuning | Negative Volume (%) |
| Standard Air Can | 100 |
| MegNeg with 0 bands | 211 |
| MegNeg with 1 band | 199 |
| MegNeg with 2 bands | 188 |
| MegNeg with 3 bands | 176 |
| MegNeg with 4 bands | 164 |
RockShox MegNeg Upgrade Kit Summary
A relatively low-cost performance suspension upgrade that not only improves small bump sensitivity but also drastically improves mid-stroke support, resulting in less pedal bob when climbing, better control on descents, and more efficient cornering. We recommend this upgrade for anyone looking to get better mid-stroke support but it’s not suitable for some heavier riders as the additional 20% air pressure would require the user to pressurize the shock over the maximum PSI limit.
What do you think of the MegNeg air can upgrade kit? Have you tried it yet? What other suspension upgrades have you tried or want us to test? Let us know in the comments section below.
Did our MegNeg Ultimate Guide and Review help you?
You can learn more over at SRAM: https://www.sram.com/en/rockshox/models/rs-upk-mgn-a1
Here are some other articles we think you will love:


Bike manufacturers who fit these shocks should just save everyone some cash and fit a painted stick in the gap. This megneg thing is like a corporate plan to squeeze the customer. Terrible shocks. Not worth updating imo. I may as well save my cash for a Fox or Ohlin shock. I even think the cheapo brand shocks would be better.
Sounds like you are having some issues setting up your shock. I would recommend you take your bike to a suspension specialist as we completely disagree with your opinion here. Shocks are probably the best they have ever been right now and the MegNeg when setup correctly on the right bike shows very noticible improvements. Setting up suspension isn’t guess work, it’s a science. If it’s not working for you then you’re doing it wrong.
Ted your an idiot open your mind mate
Yo Ted, if you don’t like Rockshox why waste your time reading reviews on them. Move on and just go ride your bike( with Fox shocks).
What would you consider heavier? I’m looking at this upgrade for all the positive reasons listed but I’m 6’4 and 220 lbs, probably closer to 235 all geared up. If I go with the rule of thumb of 1 psi per 1 lb plus 20% I would be at 280 psi. I think the max on the original can was 325psi. Does this sound right?